Monday, 20 August 2018

Monmouth, a return visit...

An eventful day out it turned out to be too...

En route to Cornwall and Devon for a few days after a trip to ride the TET in Greece all fell through, I stopped off in Monmouth to meet a mate and go for a ride. The weather was mixed with sunshine in the morning and rain later which always adds spice to the day in this area! We caught up on the gossip side of things over breakfast at the Riverside Hotel on the edge of Monmouth, then unloaded the bikes and set off for a play in the local countryside.


Gareth had the route planned and so I followed, as always when Gareth plans a route, lots of good technical lanes followed with a fair few steep ascents and rock steps that I remembered from my last visit, there are also plenty of sunken lanes lost in the bushes and a little overgrown.


We stopped in a great little cafe near Tintern Abbey, loads of cyclists use the place, the cakes and tea were good but a little pricey, once I had the picture of the Abbey and what looked like a wedding filled with classic cars and other vehicles, we then set off on a rocky little hill climb through some woodland. Great lane, lovely area...

The day finished with Gareth trapping his bike under a bit of armco fencing on a farm exit lane, the concrete surface was covered in some very slimy slurry and his bike just tucked and slid under the fencing. We had to go find the farmer and lend some tools to unbolt the fence before we could free the bike!


That night ended up in a local pub, eating and drinking until late, leaving us both merry and inebriated before dossing in our vans after a long day!


Another great day out on a bike in a lovely part of the world!

Sunday, 8 July 2018

KTM 350 EXC-F 2012: Replacing the Piston and Valves

Aaah vehicles, the joy they bring when they're working and the test they become when they aren't!!

Whilst enjoying a second attempt at the Ulverston to Holy Island Coast to Coast route this weekend, my bike decided to have a hissy fit and die in the middle of nowhere! It appears I'm not meant to finish this route...


I'd had a bit of a warning as the cam chain went rattly part way through the morning, but as the riding was pretty good and the many river crossings were going pretty well, I was being lazy and just hoping it was fine until we stopped that evening and I would look at it then, however the engine had other ideas it appears!


So with the much appreciated help of three friends, the bike returned to the van and back to my house. I commiserated with Lucy and a bottle of red wine, before sleeping and dreaming of the many possibilities of both damage and expense I would be facing!


Sunday morning dawned, I stripped the bike and lifted the engine out, so below is how I did it. It is much easier than on earlier bikes although I think the injection system is something to really take care of on re-assembly.

Setting up;
1. Strip the bike of fuel tank and plastics, including the frame protector plastics
2. Disconnect the battery
3. Take out the air filter, block up the inlet
4. Jet wash the bike thoroughly including the electric cables above the engine and in all the little places dirt hides
5. Wipe clean the top of the engine and remove any last bits of dirt from the cables.
6. Let it dry
7. Drain the coolant
8. Drain the oil


Removing the Engine;
1. Pop the bike on a stand with the back wheel hanging free
2. Remove the coolant hoses from the engine
3. Loosen the injection system clips and break the seal of the hoses
4. Unplug the stator lead at the two connectors, one black, one blue.
5. Remove the air box hose from the top of the cam cover casing
6. Remove the spark plug cap
7. Remove the bottom rear shock bolt
8. Remove the rear brake spring
9. Remove the cable attached to the starter
10. If you have a chain guard, remove this
11. Loosen the chain and remove the front sprocket
12. Loosen and lift out the clutch slave cylinder, (lay it over the frame)
13. Remove the swing arm bolt and ease the swing arm away from the engine.
14. Remove the retaining springs from the front of the exhaust & the silencer
15. Remove the silencer and the front header pipe from the bike
16. Unclip the sensor on the left side of the engine
17. Loosen the engine mounting bolts at the top of the engine (3 x 13mm nut & bolts)
18. Remove the two engine mounting bolts (2 x 13mm with captured nuts)
19. Ease the engine out to the left and pop it on a stand


Now the fun begins!

Breaking the engine apart is easy, these KTM bikes are designed to be field maintained whilst racing etc for the most part. There are a few jobs on them that requires specialist tools but for the most part you can just find what's broken, pull it out and replace it. Simples!!

What I needed to do required the following;
1. Undo the 3 x 10mm bolts holding the black engine cover on
2. Lift the cover away with the seal and lay it carefully to one side.
3. Inspect the cams and cam chain.
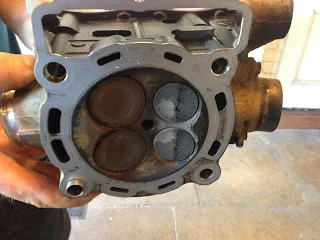
Removed cylinder head
The cam chain wasn't sat right on the cam cogs, the cams themselves wouldn't move at all, so the valves looked like they weren't happy. To get to these, you have to remove the next layer of engine casing. (Make sure you write down which cam comes from where and what size shim is in there!).

This requires the following;
1. Loosen off the 8 x 10mm bolts holding the camshaft bridge.
2. Lift the bridge off gently, easing the oil cartridge out carefully.
3. Lift out the cams and place them carefully to one side. (I checked them for scoring or wear marks)
4. Locate and release the 2 x 13mm nuts inside the engine casing
5. Loosen the two external 13mm bolts released. (These are tight, so use a long bar and a good fitting socket),
6. Then there is an 8mm nut on the other side of the engine
7. Using a mallet, gently tap around the engine casing until you can see the casing lift slightly, then ease it off the engine.

As this bike has done 400+ hours, I thought I might as well look at the piston as well, it's fine to be honest, it is coming up due for a replacement so whilst I'm doing this job anyway, it'll get replaced and I'll send the barrel to Langcourts again for a replacement Nicosil coating and honing. In the old manuals, they told you the size of the piston and the bore on the cylinder, in the current one, however there are no sizes, so I'll have to do a bit of research to find out.

Plenty of burnt fuel on here!

Not too much wear for 400+ hours

This has all the KTM 350 2012 specs.

To remove the valves however is one of those jobs that needs a special set of tools, namely a valve compressor plus a set of valve grinders and some grinding paste. I don't have these, so will go see a friend who does and deal with them from there. once I find out what needs replacing I'll order the parts but one thing I have learnt from experience is to replace all of the seals and the gaskets anyway. Don't skimp on this, it will come back to bite you.

The workshop manual for this bike is HERE
The KTM manuals page is HERE

05/08/2018 - All the parts have arrived!

Parts from Eurotek in Ripon
Now I have lots of expensive shiny things, I started to rebuild the engine. I also bought a valve removal tool and a chain splitter small enough to break the cam chain as they come as a sealed circle. You need something that goes to 2mm diameter for this and I only found one choice here in the UK. Remember to coat everything in fresh engine oil as you rebuild or buy the specific sticky oil which doesn't drain off as you're rebuilding things.

Ebay to the rescue again!

Changing the Cam Chain
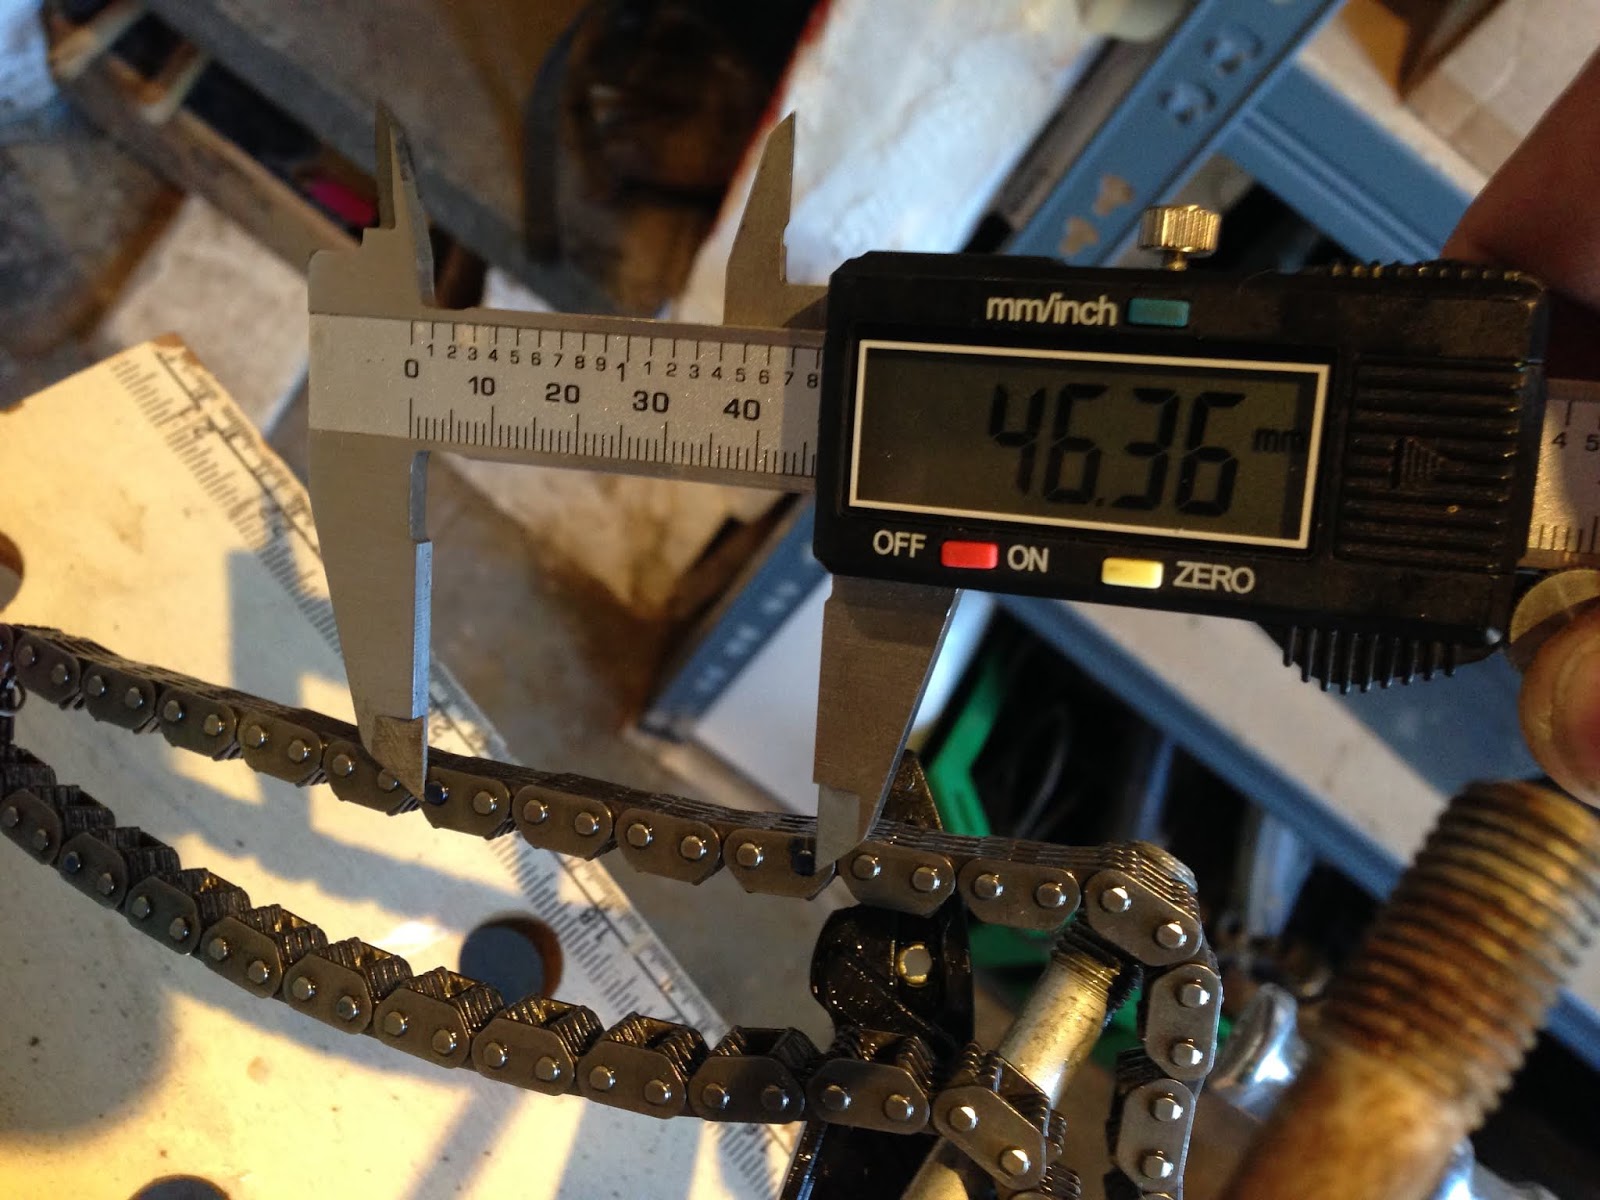
Cam chains these days are pretty reliable, but they do wear, and Geoff, a mate of mine who helped me rebuild my old 400 (who is also a bloody good race mechanic). They wear the same as the main drive chain, ie the rollers and plates wear away, which creates bigger gaps and makes the chain sloppy. A good way to check this is to measure the chain from pin to pin and look up the tolerance for your bike, or just change it anyway as it's good practice!

The length of 8 pins on the old chain
Pop a rag into the engine block to stop debris dropping into the engine, then using the 2.2mm pin drive on the chain tool, you push out the pin on the old cam chain, do not remove it all the way. Split the new chain in the same way and attach one end to the old chain, then pull it through the bottom end, split the old chain from the new and re-install the pin to close up the new chain. Job done.

Installing the Piston.
Inserting the new piston into the newly coated middle section of the engine block is not easy. Pop the gasket on first, the if you have the KTM tool, it must be easier, but I didn't, so I first attached the piston and tried to lower the casing onto it, but it catches on the piston rings, so I too it back off and inserted the piston (on the workbench) partway just to hold the rings in place. Be very careful not to damage the bottom oil ring as it is made up of two parts, a long spring and the outer race, they are joined but very fragile, if you bend or damage it you have to get a new one and try again. One I had the piston mounted, I then popped it onto the crankshaft. This is a delicate job, so have some patience and get the locking ring on the gudgeon pin in place, I needing a flat bladed screw driver and lots of patience. (Remember to pop a rag into the engine hole below where you're working or when you drop the ring it'll be a much longer job!! ).

Old (after some cleaning) and the new piston 

New piston and barrel in place
So the stages are;
1. Pop gasket in place
2. Oil the cylinder face and piston parts
3. Insert gudgeon pin partway into piston
4. Insert piston into cylinder just to hold piston rings in place.
5. Put piston on to crankshaft with the casing attached, ease the cam chain and cam chain guides through the new casing to get this into place.
6. Drop into place making sure it all fits neatly.
7. Pump the piston to make sure it moves nicely.

Building the Head
I spent a fair bit of time on rebuilding the cylinder head, mainly so I could learn about it and also as it is expensive if you get it wrong!! A full valve kit is around £350, so for us mere mortals in the money world, you only ever replace what you need to. In my case I checked all the valves and could only find one that osculated very slightly, so I took all four valves to WM Moto in Carlisle for a second opinion. They agreed and so I ordered the replacement intake valve from them and the cam chain adjuster, which is what had started all this rebuild!

Installing the Valves
Once the rest of the parts arrived I rebuilt the cylinder head, installing the valves into their guides and really taking my time. Each valve goes into place, then I used the valve tool and paste to lap them into place and make sure the fit is tight with no burrs or visible holes. (Here is a YouTube film of a car engine being done). I could have saved myself this job if I'd recorded which valve came from where, but as I had to do it for the new valve, I did it for all of them to be sure. Check the servicing manual for the exact specs on all the parts to this.

 Once happy with that part, I turned the head over and mounted it into a vice, installed the valve springs and the collets with the valve compressor tool. For this you need a fine set of tweezers and a screwdriver with a magnetic end, as you will drop the collets and they will drop in sideways etc!!!

Wrong!!

Perfect fit!


Once this lot was in place, bolted down and all torqued up then it was time to play with the cams. Head bolts are 50nm, the little bolt on the side of the engine is 25nm.

Installing the Cams
Mounting the cams is another one of those jobs, it's easy and can be quick, but make sure you get the timing set up correctly before you move on. In the service manual this part is done in two stages, 1. setting the timing, 2. installing the shims and setting the gap correctly. The service manual has a load of checks in it for all of these parts with the specs etc, it's a good idea to look at it.

Check the cams over for any wear and damage, for my bike, there is very little, but some things to look at specifically are chips of marks on the cam faces, damaged teeth, check the spring on the exhaust cam that releases the counter balance weight and the oil feeder on the intake cam. Also check the cam followers and the bars they sit on for wear. Install the intake cam first and work back to front.

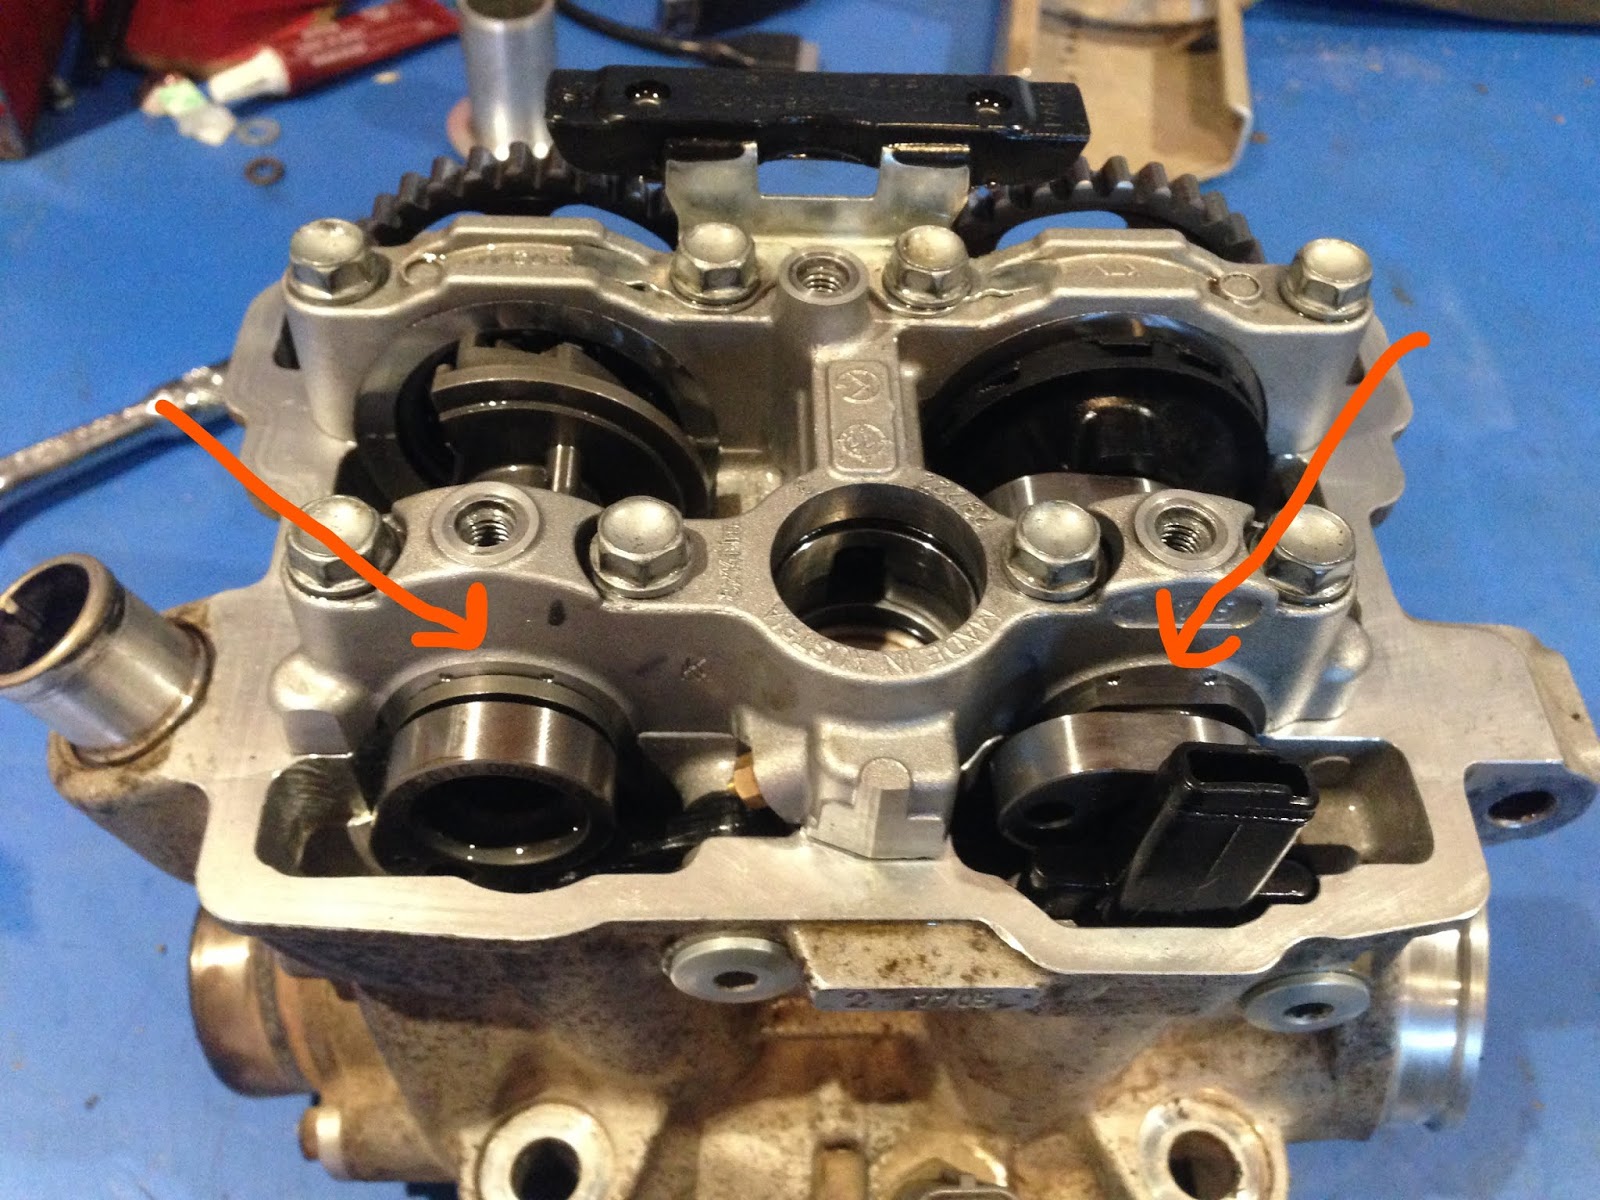
Intake cam on left, cam followers at top right.
Once you're happy everything is good, install the cam chain followers into the holes and seal up the external caps, (just check the o ring on these for damage). Pop the intake cam in place, then mount the chain over it and ease the exhaust cam under the chain and into its slots.

Exhaust Cam, (timing out), Intake cam (Timing good)
Once they're in place, mount the bridge, chain tensioner and tighten down. In the pic above is where to find the timing marks on the cams, (KTM has a specific tool for this to make sure it's correct as it affects a lot of things, so if you're unsure get a second opinion!). Once this bit is good, then demount the whole lot and look at installing the shims.
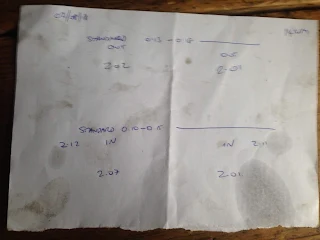
Blurry pic, sorry!
I measured these at least four times to make sure I was happy with it, each time you change something you have to rebuild the lot including using the torque settings for the bridge, but if it's wrong, you'll have to do it again anyway, so take your time and get it right first time. (Tolerances are in the manual but interestingly there is no starting size listed, so it may be worth asking your local KTM dealer if they know these).


Once this is all built, then check the timing again and torque down the bridge for the final time. Pump the piston a few times and check the timing again, then pop the spark plug cover in place and mount the black engine casing with it's three bolts.

Remount the engine and reverse the initial process at the top of this post. When you're all done, say a little mantra, 'it will work, it will work' and hit the starter button. This will either make you smile or cry!!


Saturday, 30 June 2018

Passion or Obsession?

One of the things that regularly go round in my head is the idea of quitting our troubled country and heading away on a bike to see what the rest of the world is like... I find myself writing this with a deep feeling on unsettledness and a plain old sense of misery because I find myself doing the daily grind of earn money, pay bills, eat, sleep... repeat!

Anybody who knows me well, knows my itchy feet and also knows I am always planning something as an escape. The plans don't always come to fruition, but something generally replaces that plan and provides me with either an adventure or I meet people who set me off in a new direction.


At the moment, I'm finishing off the project of repairing the Old Coach Road in Cumbria. By throwing myself into this I've personally learned a whole new set of skills, road maintenance wise and project management wise. I've learnt a lot about the intricacies of our legal system, the fact that our government are generally a bunch of thieves in suits and that the general public are the ones who are suffering from the greed on show from our current crop of leadership.


What's ironic, is that if it wasn't for the fact that my biking life has taken me away from road riding and into the word of both adventure riding and trail riding I would never have learnt these skills or been aware of these things, I would never have seen both the positive and the negative side of living in the UK in such stark and contrasting light. I'm sure biking would have taken me to another place and I'd have learned other things but because of the choices I've made these are the lessons I've learnt and I wouldn't change that at all.


When I interact with the people who are termed 'antis' because for whatever reason they think all green laning should be banned, I am constantly amazed that people with any intelligence at all can be so intolerant and unforgiving whilst at the same time blatantly ignoring their own impact on our crowded environment. These same people go home to their loved ones and are a completely different person.

In the world of MPV users, I am polarised by watching the folk who ignore any of the socially acceptable behaviour patterns because all they see is the closure of the lanes and believe that it doesn't matter either way what they do, they will be treated as criminals anyway so why not be one and the folk who 'keep fighting the good fight' and follow the rules, learn the game and try to make things better for all users not just MPV groups.

None of this is helped because in reality the general public is not party to the planning and discussions that lead to things like the NERC Act etc. That is all done behind closed doors within the elite circles that still really control the UK and their decisions are only ever beneficial to their aims.

This all leads me back to my personal quandary, quit this country and ride into the sunset to see what the rest of our fabulous, but troubled world, has to teach me or stay here and try to find a solution to my personal battle of feeling both frustrated and angry that this country is going the way it. Intolerant, myopic and self destructive would be the words that spring to mind!


I can honestly say I have met some fabulous people in the motorbike world, they are as passionate about their activity as the people I have encountered in the mountain world, so mixing the two is a seamless process for me... This is part of what has kept me here so long this time around!


One thing for sure is that the coming weekend will be a ride with some friends into some new terrain, offering some fresh challenges and visiting places I've not seen before. We'll combine bikes, camping, rivers and a coastline and hopefully complete a ride that was started at the end of winter which suffered both snow drifted closed roads and bike issues. Let's hope this one fairs a bit better and also that it satisfies my need for a little bit of adventure and challenge, thus staving off the travel cravings a little longer!

aah the perennial question, passion or obsession??


Monday, 18 June 2018

'Green Lanes: Maintenance and Organising Repair Days...

One of the things that I've noticed more and more in the time I've been riding the trails here in the UK is the complete lack of maintenance that happens on these types of roads. It's an interesting conundrum as there seems to be many parts to the decisions made to not upkeep these lanes as well as all the politics that seem to revolve around green laning as a general anyway.


For myself, I've been watching my local lanes slowly become eroded away by the weather until now, one of my favourite lanes is under threat and there is no plan visible to rectify the issue. So, in discussions in the pub and via email, I decided to try to tackle the problem head on and see if I could find a way to re instate the Old Coach Road into a more acceptable state of repair for all user groups.

In 2015, Storm Desmond wrecked the Old Coach Road in three days of epic rain. That single storm left a trench about five foot deep and four foot wide in the middle of the lane. Since then, some enthusiastic volunteers tried to refill the trench manually and the road made passable but nowhere near back to it's original condition. Subsequent heavy rainfall has repeatedly washed out more material.


This can be linked to the fact that the man who used to clear the culverts and drains up there wasn't replaced when he retired, which is the same story for the upland water team too, so since the late 90's and into the early 2000's this road, and all other unsurfaced roads have had almost no maintenance at all.

So, to fix the lane required a series of things, CTRF identified the following list...

1. Expert advice
2. Permissions
3. Funding
4. Drainage repairs/replacements
5. Stone
6. Trench back filled
7. Surface re-established
8. Stone pitching in two places
9. Ongoing maintenance

Looking at each one in turn, the first problem is one of sourcing expert advice, fortunately for CTRF we have a couple of people to call on for this, who have over 30 years of upland path repair knowledge and experience and also coincidence played it's hand as I was now working with two large construction firms, Ashcrofts from Workington and Sir Robert McAlpine on a large building project. Good relations on all sides led to plenty of chats and even some help with the relevant paperwork. Bonus!

Permissions... As the Coach Road is a County Road, it comes under the responsibility of the County Council Highways Department. This is a department that is seriously under pressure as the growing levels of rainfall, the harsh winters and the overall increase in traffic volume is all combining to wreck the surfaced roads in every part of the UK. Couple this with successive governments reducing allocated budgets annually and the mix is not so good for green lanes!

To get to talk to someone in the Highways dept is apparently impossible, according to all the people I spoke too prior to commencing on this project. These included National Park Rangers, National Trust Rangers and various other people 'in the know'. To this day I have no idea why my particular email was answered, I'm just grateful it was as it crossed off the first hurdle in a long list!


The Network Manager turned out to be a typical local Cumbrian lass who had done her job for over twenty years, she was very relaxed and chatty albeit cautious as to why myself and a mate, (Nigel), as 'off road riders' would want to talk to her about repairing an unsurfaced road in the hills outside of Keswick!

We outlined our desire to undertake some hand tools only remedial works clearing drainage gullies on the lane and after a thirty minute conversation, she gave us her permission with the proviso that she had no money to spare to help us and she needed all the paperwork and insurances in place before we could proceed.

After this, there is the Lake District National Park, (LDNPA), Natural England, the National Trust, (NT), the 'Commoners', (the farmers who work the land and rent their farms from the NT), any householders nearby, the Trail Riders Fellowship, the Green Lane Association and anybody else we could get into the pot!

All of this took a few month's to sort out, lots of chats, lots of emails and as the project evolved, lots of paperwork!

We set out a plan  in a paper report and did several days of on the ground survey work, taking photos and recording the damage as well as identifying the drainage culverts and set up. In the plan we included the costings for the materials, contractor and sundries and came up with a figure of nearly £20,000. That was a little daunting as a figure!

Testing our Theories
Our first stage of repairing this lane was to run a 'hand tools only' repair day, which we did in December 2017. There was snow on the ground, the temperatures hovered at zero and below, yet on a beautiful sunny Sunday in winter nearly twenty folk turned up from all over northern England to dig out a drainage gully and clear some culverts.


The LDNPA kindly lent us some mattocks, shovels and spades, the team assembled and we cleared 500 yards of some fairly well choked gully and opened three culverts to restore their flow. A hearty well done goes out to all of those people from all walks of life for their efforts, camaraderie and general happy demeanour!

Despite all this good work, one thing became apparent, the lane is five miles long so five hundred yards in one day leaves a lot to sort and our efforts had shown that the work required either a lot more hands or more realistically, mechanical assistance!


The upside to this day was that we now knew our theories about the 'how' were based on fact and evidence, so the project moved on another step.

Back to the 'permissions' part, We now needed permission to introduce machinery into the mix to make a difference on this road. So we went back to the afore mentioned Network Manager with an update of the works done and a politely worded request. Permission was granted providing we have a suitably qualified and insured person, plus could establish the situation regarding utilities in the areas of work.

The paperwork trail grows like leaves on a tree as this goes forward and the complexity of the job also grows as more questions start to come out of the dark. For example the list of consultees for the utilities search is around 20+ companies, all of which have to be approached, asked and the answer recorded on a document which can be checked and which becomes a legal document should any injury or accident happen.

The picture below shows the file I created for this project. The 'Lifting Certificates' are the contractors various insurances. The 'MS' is Mission Statement, all construction sites have one of these. It is basically the plan for the works to be carried out and links all of the other documents together.

Paperwork needed by Cumbria County Council

Now I like machinery, I like machinery that does it's job well, but all machinery in these situations is only as good as the man driving it... So to find that man, we started to ask local firms who could be interested to help. Again the LDNPA came to our help and gave us the name of the contractor they used in the area, he was busy for the next few months and recommended another, he looked at the job and decided that as it was on his doorstep he was happy to get going as soon as we wanted too!


Funding, Drainage and Materials
One of the big issues for repairing this lane is the stone needed to replace the road surface that has been moved by water. There is an awful lot of it at the bottom of a section of the road called Hausewell Brow. It is fanned out across the peatland there waiting to be scooped back up and re used, but it's not enough and we needed bigger stone to lay the drainage base below the surface. Replacing this would also form one of the biggest costs to the project


Talking to local people got us a name, that was the name of the owner of the quarries that sit on the Old Coach Road. We eventually tracked him down eating his lunch in a barn whilst putting a replacement engine into his beautiful Series 1 Landrover. He gave us permission to use the stone from his quarry and best of all, he didn't want anything for it as it was to go back into where it had effectively came from, so even negated the taxes on aggregate! Ian is a character of the highest order, he owns all the quarries around the area and runs his trains around the Threlkeld Mining Museum throughout the summer. One of his team has also tracked the geological history of the Lakeland hills and is another source of fascinating facts and history. So the tapestry of the picture is becoming even more complex and interesting.


Funding started to become the next part of the project now we knew things could go ahead. Discussions were had and possible resources were identified, so we started with the organisations that promote responsible trail use in the UK, these consist of two main ones. the Trail Riders Fellowship, (TRF) and the Green Lane Association, (GLASS). Applications went in and whilst we awaited the replies we looked at other options.
We approached the LDNPA & CCC and were told no, no money available, this was a bit galling given the money being spent upon footpaths and bridleways in Cumbria at the same time, but we swallowed our initial reaction about this and moved on.
Next we approached United Utilities, who had, during one of their presentations for the pipeline installation programme, promised funding to local community projects and had specifically mentioned the Coach Road. After being bounced around for a month from email to email, we have yet to get an answer from them, we continue live to in hope!
After this we went out to the users themselves and started a project, with help from the TRF marketing team to try to raise the money from the actual green lane user community. We're currently partway through this so I'll update as and when we get to a total. But a big thank you needs to go out to all those folk who are so passionate about their past time that they have donated money to this project, from all over Europe as well!
Whilst all of this was going on GLASS donated a whopping £5000 to the pot, this paved the way for phase 1 to be completed, so as we now had all our ducks lined up plan, paperwork and permissions wise, off we went and set the contractor the task of opening up the existing drainage gully that runs the full length of the road. He took five days to complete this in May 2018.


So we're currently at the stage of raising the funds for Phase 2, which will see the installation of the replacement damaged culverts, re-opening of the undamaged culverts, re-establishing the surface drainage and finally reinstalling the surface materials.

We're hoping to get this done by the end of Summer 2018, but that is as ever dependant upon the funding, so the link is here below for those that would like to donate to the cause!


FUND RAISING JUST GIVING PAGE

Here's an article LINK from one of the guys working on a repair day recently...