With just being back from 3 months of riding time, with very minimal servicing, it was time to give the bike an overhaul. Both of the 350's have performed faultlessly over that time, with the only issues being clogged fuel filters and a couple of wheel bearings wearing out.
The 2012 is going to need a top end rebuild shortly I feel, but I want to ride until the end of the summer, so have decided to adjust the valves and service everything.
The jobs in this post will be:
1. Oil/Filter change
2. Air filter change
3. Brakes - Pads change
4. Front brake master cylinder service
5. Bleeding the brakes - Front & Rear+
Oil & Filter Change.
On this bike, there is one paper oil filter & 2 filter screens to be changed/cleaned. The specified oil is 10w/50 fully synthetic, at 1.2 litre for a full change. (You can use 10w/60 and I have done in the past, but have swapped back to this these days). I've read a lot about oils over the years and the simplest thing I've found is to buy the best you can afford but change the oil regularly. In the UK 1 litre of oil is around £15.00,
the paper oil filter is about £3.50, (but you don't need to change the paper filter every time if you're a light user of your bike).
The process is simpler on this bike than the older 400, mainly because there is now only one paper filter. I've listed the steps I do below;
Tools for this are a 13mm ring spanner/socket, 8mm ring spanner/socket,circlip pliers, oil drain tub, medium sized funnel, some old cloths and a small torch.
1. Start the bike and warm it up for a couple of minutes to circulate the oil and make the viscosity and little thinner. It also moves any crap around into the oil that has settled to the bottom of the engine whilst it's been standing.
2. Remove the belly pan
3. Open the oil filler cap on the right side of the engine
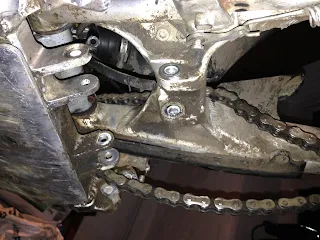
4. Position the cloths and oil drain tub underneath the bike, take the 13mm spanner and locate the nut on the chain side of the bike at the bottom of the engine, facing the rear wheel. This has a magnetic tip on the inner pointy bit.
5. Crank this open and remove. Once it's out and in your hands, before you clean it, check it for metal deposits and the colour of the oil. There should be a copper washer on it to, you'll need this later on. Clean it once you'ce checked it over.
6. Leave the bike to drain for at least half an hour
7. Undo the oil screens, remove them, clean them, check their O rings, replace as necessary, then return them back into their slot. Check your manual for the torque settings for these.
8. Undo the two nuts holding the cap in place for the paper oil filter. they are 8mm. Take these out and ease the cap off, there is an O ring in the cap, so be careful not to damage it. I remove the paper filter with a set of circlip pliers. Once it's out, I clean the hole inside of old oild and check the whole thing for damage. Leave it to drain.
9. I clean all around the engine whilst I'm waiting for the oil to drain, especially the bottom part around the oil drain hole.
10. Check the copper washer isn't damaged on the oil drain nut, then return it to it's home and tighten it carefully. Do not overtighten this, if you thread this you will have a much bigger job on your hands! Check your manaual for the torque settings again.
11. Replace the paper filter, put a smear of fresh oil onto the rubber seal of the paper filter before you pop it into the casing, press it home carefully. Replace the filter metal cap and again be very careful not to over tighten the 8mm bolts.
12. Fill up a container with 1.2 litres of fresh oil, I rest the funnel between the engine casing and the kick start, then pour the oil into the engine slowly.
13. Once it's all in, I pop the oil filler cap back on and let the oil settle for 5 minutes. I then start the engine and let it warm up. It takes time for the paper filter to soak in the fresh oil. Once the engine has warmed, I turn it off and let the oil settle again, then stand the bike upright and check the oil level in the sighting glass below the rear brake pedal. If it's about half way then it's done, if it's low then I add a tiny bit more through the filler cap, but being very careful not to over fill as then you'll need to drain any excess.
That's it, oil change done!
Air Filter Change
Changing the air filter regularly makes a huge difference to the power of the engine, the life of the engine and your fuel economy. It's an often overlooked area, but it really does save you money in the long term.
You can buy
pre-oiled sponge filters or
oil your own, the prices vary between £12 to £30 dependant upon several factors as always. Pre oiled ones are more expensive. The
filter oil is about £8 a can and does loads of filters. For me, I buy the unoiled ones and oil them myself, you need to be a bit proactive with this as they need time to drain. If you have too much oil on them, it gets into the fuel system and clogs it up.
There are loads of
videos about the process on YouTube.
Most of the time I don't bother to clean them, I just oil a new one and use that. But if I'm running low on cash or if I'm out on a bigger trip then I'll do the cleaning job.
The process is easy and you don't need any tools really.
1. Remove the air box cover
2. Unhook the double wire and open it up
3. Pull out the air filter, do this gently as it rests on the inside edge of the air box on some plastic lugs.
4. Take the foam air filter off the plastic case by pulling off the corners and taking the central male/female part out.
5. Clean or discard as you see fit.
6. Check and clean the mesh on the plastic guard
7. Remount the clean & oiled filter
8. Replace it back into the air box making sure it sits flat on the lip of the air box intake.
9. Re-hook the wire, there is a middle male/female bit in the central part that needs to be popped into the central hole in the air filter.
10. Re-fit the airbox cover
Air filter change done!
Brake Pads Changed
The pads on both the rear and the front are pretty simple to change. I generally take the calipers off to inspect the whole set up as well, but if you're just changing the pads, then there is generally no need to remove the rear caliper as the pads will slot right in with it in-situe. For the front though, you need to take it off.
Brake pads come in two types, sintered and organic. The sintered pads are really good for road use where you're braking hard to peal off speed, the need heat to build up to make them work well. For trail riding the organic pads work better as they are a little softer and require less heat to make them work better. They also have the added bonus of not wearing out the softer discs on a modern dirt bike so quick, which ultimately saves you some cash!
Front Caliper
Tools needed are a 10mm socket, a long handled flat headed screwdriver, a pair of cutters, a pair of bottle nosed pliers, an old toothbrush and some copper slip grease.
Again, the process is pretty simple.
1. Cut the cable tie holding the speed sensor cable in place
2. Undo the 2 x 10mm bolts holding the caliper to the fork stanchion
3. Ease the caliper off the brake disc. (You may have to use the long handled screwdriver to prise the pads apart a little).
4. There should be two split pins holding the pads in place, ease these off with the bottle nosed pliers and the pads should then just drop out into your hand.
5. Make sure the pistons and inside face of the caliper are clean and not damaged. Use an air tool to blow any crap out if you have one and if not, use a toothbrush to clean around the piston edges etc.
6. Make sure the pistons are retacted all the way, then smear two thin circular patches of copper slip onto the back side of the pads about where the piston will touch. (This reduces the squeal you can get from your brakes). In some cases there may be a seperate piece of steel plate between the pads and the pistons, if so clean this and put it onto the new pads, then put a smear of copper slip onto the piston side of the plate.
Be very careful not to get grease on the braking pad and clean your hands before trying to remount the pads.
7. Slide the pads into the guiding slots in the caliper, the pads will only fit well when the end without the pin holes in it are seated correctly.
8. Slide the cleaned pin back into place to hold the pads into the caliper, pop the retaining spring clips back into place, then spread the pads apart as far as they'll go with the screwdriver, do this gently so as not to damage the pad material.
9. Remount the caliper onto the disc, bolt it back up, check the torque settings.
10. Now replace the cable tie around the plastic body of the speed sensor cable, trim the extra off.
11. Pump the brake lever on the handlebar several times to make sure the pads are seated against the disc.
Rear Caliper
1. Spread the pads apart with the screwdriver
2. Pull the two split pins out of the retaining pin with the pliers
3. Slide the pads out of the caliper & discard
4. Make sure the pistons are retacted all the way, then smear two thin
circular patches of copper slip onto the back side of the pads about
where the piston will touch. (This reduces the squeal you can get from
your brakes). In some cases there may be a seperate piece of steel plate
between the pads and the pistons, if so clean this and put it onto the
new pads, then put a smear of copper slip onto the piston side of the
plate.
Be very careful not to get grease on the braking pad and clean your hands before trying to remount the pads.
5. Slide the pads into the guiding slots in the caliper either sde of the disc, the pads
will only fit well when the end without the pin holes in it are seated
correctly. There is a spring sheet that helps to get this in place on the top of the caliper.
6. Slide the cleaned pin back into place to hold the
pads into the caliper, pop the retaining spring clips back into place.
8. Pump the foot brake lever several times to make sure the pads are seated well against the disc.
Servicing the Front Brake Master Cylinder
Periodically the rubber seals on the master cylinder pump degrades and then allows air to pass into the master cylinder and the rest of the brake system. KTM have a kit for this, so you just buy the kit and replace the parts, then bleed the brakes and it's sorted.
Tools needed are 10mm socket +ring spanner, circlip pliers, Dot 4 brake fluid, cloths.
To change it out, you'll need to do the following;
1. Remove the two screws in the top of the master cylinder cap, do this gently as they are very soft.
2. Use a rag and soak up the brake fluid in the reservoir
3. Take the brake lever off and it's rubber cover.
4. Take the handlebar bracket off and lift the MC off the handlebar, you probably have to loosen off your throttle a little to get at the bolts.
5. Pull the rubber boot off the inside face of the MC carefully and catch the spring underneath
6. Study the seating of the circlip to make sure you know it's correct location, then remove the circlip from the inside face
7. Pull out the plunger and spring from the inside of the MC body.
8. Clean every part of the MC casing.
9. Open up the replacement parts, lay them next to the old parts and check they are the same.
10. Wipe some clean Dot 4 brake fluid around the seals on the plunger O rings and the shaft to lubricate the whole thing. (If there is some lube with your kit use this instead).
11. Insert the spring and the shaft into the MC, then ease the circlip into place. Check this is seated correctly.
12. Replace the outer spring and the rubber boot.
13. Remount onto the handlebars, do not overtighten the bolts because if you thread them you have another job to sort out.
13. Remount the brake lever and the rubber boot
14. Bleed the brake system through - (See below)
Bleeding the Front Brake
This is an annual job for me or anytime I feel the brakes aren't working well. It's a job that a lot of people have problems with, mostly because of a lack of being slightly anal about the process and also because they leave the caliper drain plug open a bit when they release/pump the brake lever. Take your time, check every stage, clean everything, use clean/fresh brake fluid and if necessary get someone to help you with the brake lever, but be very clear with the instructions of when and how to do things.
Tools needed are an 8mm ring spanner, Dot 4 brake fluid, cloths, a length of clear plastic hose & a jam jar.
1. Make sure the bike is upright and the brake master cylinder is level.
2. Remove the dust cap from the bleed nipple and put the 8mm ring spanner on it carefully. This is another soft metal part, so don't damage the hex shape by being heavy handed and make sure the spanner fits well.
3. Place the plastic hose onto the nipple trapping the spanner in place, the hose should be a tight fit, the loose end of the hose goes into a plastic jar on the floor. It doesn't really need any fluid in the jar, it's used more to catch the waste.
4. Remove the two screws in the top of the master cylinder cap at the handlebar, do this gently as they are very soft. There is a rubber seal on the inside, be careful with this.
5. This next bit is where you need to be careful as well, you need to be able to reach the brake lever and the 8mm spanner on the bleed nipple easily. Once you can, press the brake lever into the handlebar, then open the bleed nipple. fluid will come out, close the bleed nipple, then release the brake lever. Make sure you do this in a sequence and try not to go to fast. Continue this until the MC reservoir is about half full.
6. Top up the MC reservoir with fresh fluid.
7. Keep repeating 5 + 6 until the fluid coming out the hose is clean and clear, with no air bubbles in it at all.
8. Once your happy the brake lever has a nice feel to it and the lever is not going back to the bars, then take the hose and spanner off the bleed nipple and clean the whole area with a rag before replacing the dust cap.
9. Replace the MC cap with the fluid near the top of the viewing glass and tighten the cap screws up gently making sure the rubber seal is in place.
10. Roll the bike around and pull the brake lever several times, the forks should dive and the bike should feel smooth on the brakes. If not repeat the whole process again.
NB: If you've replaced the MC piston and internals, you may need to leave the lever compressed against the handle bars with a cable tie overnight. This allows the rubber seals to swell as they soak up some brake fluid. They then work much better and the brake system will bleed through much easier the next day.
Bleeding the Rear Brake
Again another annual job for me, actually easier to do than the front as you're right next to everything. the Master Cylinder sits behind the right footpeg and the bleed nipple faces the rear shock.
Tools needed are the KTM ring spanner for the cap on the MC, (it's an odd size and this is made forthe job), 8mm ring spanner, Dot 4 brake fluid, cloths, a length of clear plastic hose & a jam jar.
1. Make sure the bike is level and all the work areas are clean.
2. Take the cap off the rear MC, lift it out being careful not to damage the large rubber boot on the inside. Clean it and check the O ring on it.
3. Remove the dust cap from the bleed nipple and put the 8mm ring spanner
on it carefully. This is another soft metal part, so don't damage the
hex shape by being heavy handed and make sure the spanner fits well.
4. Place the plastic hose onto the nipple trapping the spanner in place,
the hose should be a tight fit, the loose end of the hose goes into a
plastic jar on the floor or a box. It doesn't really need any fluid in the jar,
it's used more to catch the waste.
5. Press the foot pedal down until it stops
6. Open the bleed nipple and let the fluid come out
7. Close the bleed nipple
8. Release the pedal, wait for the sytem to move fluid around, then repat the proces of 5/6/7. You can hear the fluid move. If you do this too fast the pedal will not do anything, so take your time and get a feel for the process.
9. Repeat this until the fluid runs clear and you can see no air bubbles coming out of the clear hose.
10. Make sure the MC is full, leaving a tiny bubble of air in the viewing glass, then reseal the MC with the screw on lid and use the KTM spanner to gently tighten it up. The rubber boot will take up a lot of space in the tiny MC.
11. Pump the brake pedal a few times to makle sure it feels good and then start the bike and take it for a ride to test the brake, it should work well and smoothly. If not repeat the whole process until you're happy with the feel of the brake.
OK that's the lot for now, next up with be valve clearances...
Cheers


