Friday 8 October 2021

AJP SPR310r 2021 Review

 I was fortunate enough to be offered the opportunity to use an AJP SPR 310r for a four day Coast to Coast trip with a group of riders from one of the northern England Trail Riders Fellowship groups.

AJP UK supplied the bike via their dealer MHB Motorcycles, based in Kirkby Stephen, Cumbria. We agreed a few minor changes from the stock bike and added a couple of accessories for the trip. Before we get into that though, a little bit of history for the SPR 310r bike.


AJP is a small family motorbike manufacturer based in Portugal. All of the build work is done by their workforce in-house, so in essence the bikes are hand built. The engines come from the original Husqvarna bikes, (Before KTM bought them out). AJP buy the latest generation, then couple them with the Athena fuel injection/ECU set up. The frames and swing arm are an in-house design and the main components are all supplied by quality manufacturers, such as Brembo for the brakes, Sachs for the suspension, Acerbis for the fuel tank and plastics etc.


The bike itself is the latest generation of the their discontinued PR5 bikes, with some significant upgrades and design changes. The PR5 was water cooled, so is the SPR 310r. This made it a little more expensive to buy than the other bikes in the range such as the PR3 and PR4.


The PR5 was generally built to a budget and keeping in mind the fact that AJP is a small manufacturer and as such needs to manage it's cashflow carefully to stay alive, they used quality components bought in as opposed to designed and built in-house. (An example of this was the Zongshen 250 engine used in these bikes, an engine that is used by a lot of European bike manufacturers). The current AJP SPR 250 still uses that engine.

I can only guess at the conversations around the boardroom table with regards to the rebranding of the bike range, but the result is now available to buy. The PR7 is the premier bike of the AJP brand, built as an adventure bike straight out of the box. The SPR 510r & 310r share components from this bike, such as the fuel injection system, the swing arm etc etc. What they also share is a quality finish to round off the design specs. AJP have decided to move the goal posts in terms of build quality and the SPR bikes and PR7 leads that charge. So, onto the SPR 310r review from a rider's point of view. 

First impressions:
When I first saw the bike coming out of its crate direct from Portugal, I liked the look of the bike. I've ridden KTM's as my main personal bikes for a few years now, alongside this, I've also managed to ride just about every other make and model of bike whilst out with friends. I understand what makes a good dirt bike and to my eye, the bike just looked 'right'. We put it together and rode it around the forecourt to get a feel for the engine. At the time we had both a 250 and the 310r built, so it was easy to ride them back to back.

The 310r felt punchier, had more grunt and sounded a little more raucous than the quieter and smoother 250. The front wheel lofted in several gears and the brakes felt sharp. The geometry of the bike had me feeling a little cramped at first, but on a longer 100 mile ride around the Dales, it soon felt comfy, albeit my knees felt a little higher than on a KTM

The gearing was very definitely set for a track. 1st to 4th were so short, I was through in seconds and spent most of the day in 5th & 6th on trails and roads. 

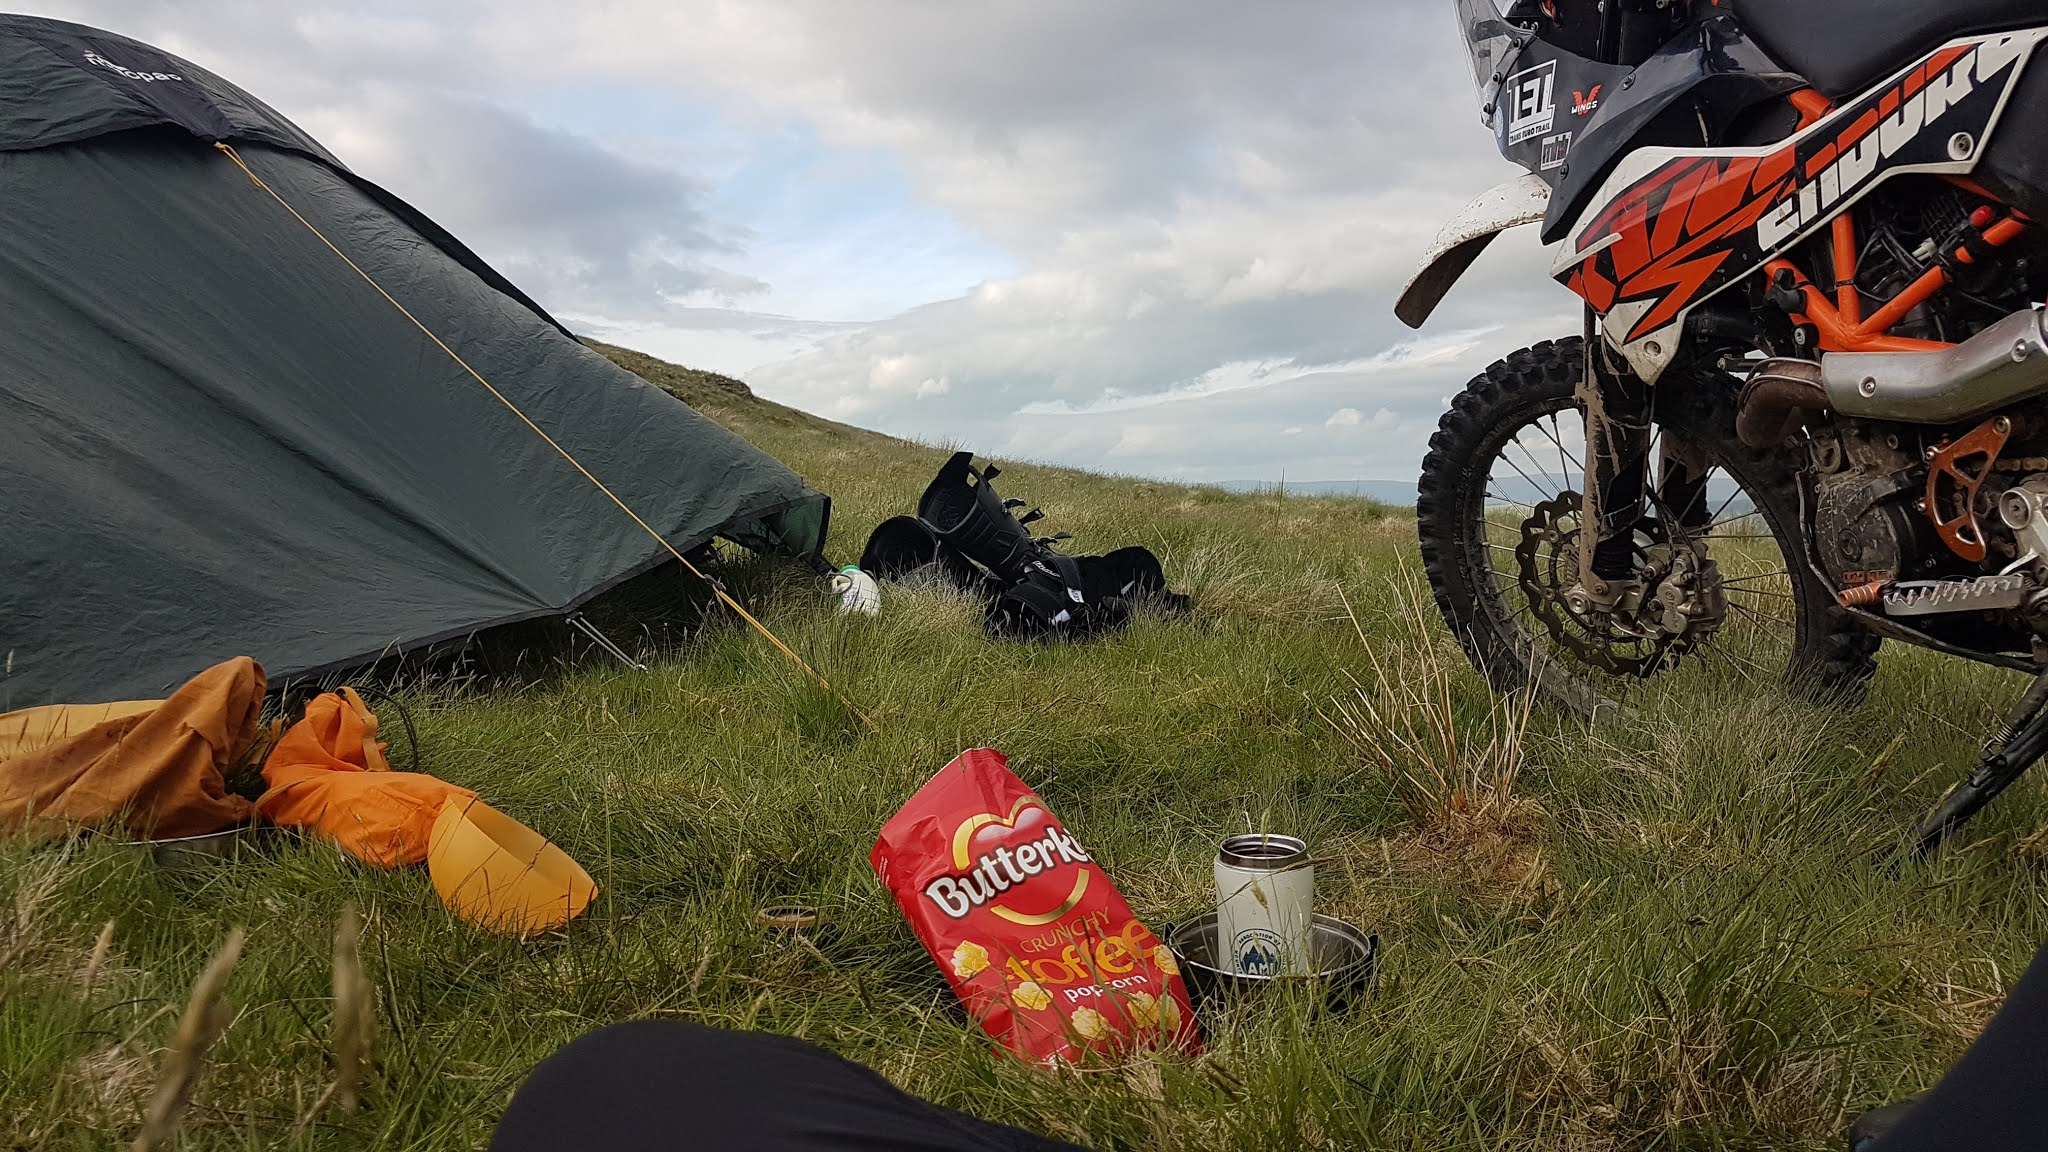
Coast to Coast trip:
We planned to ride the bike out and was lucky enough to get involved with a local TRF organised 4 day ride. So, with this in mind, we decided to make some changes to the bike for such a trip. 
First up was discussions about the gearing for longer road stretches, after plenty of debate and research online, we settled for 13 up front 48 on the rear. This gave us a longer 1st to 3rd and a top speed of 60 miles per hour on the tarmac. 
Next up was additions. We added a pull strap to the front of the bike in case it got stuck somewhere, hand guards to protect levers etc, we then added some tie down loops to the rear tank, both on the sides and underneath. Next up was a GPS to navigate with and finally was luggage options. Here we started with a drybag on the back for a tent, but it soon proved to be damaging to the rear plastics, so we swapped to an over the saddle bag, the Giant Loop Coyote, which worked excellently for the last three days of the trip. 


Over the four days, we clocked up just over 800 miles. The terrain was a good mix of all types of roads, 'green lanes', river crossings, steep ascents, steep descents and plenty of tarmac, where the bike would be sitting at 50 - 60 mph for long periods of time. So first up the positives.

Riding Position/Ergonomics
When I first sat on the bike, it felt a little cramped, (coming from a KTM 690, that is not surprising I guess). My knees felt high and I had to adjust my sitting position accordingly. Over time, this became a non issue and I found the seated position to be comfortable over longer days.
The saddle was comfy, which was a nice touch after using KTM saddles, (which are like planks on every bike I've ridden to date). The filler cap for the rear tank in mounted at the rear of the saddle. This meant that if you stretched back a bit, you were actually sat on the cap, which is uncomfortable, but sit forward and it's a pleasure to sit on. 
The handlebars, levers, clock and switches all felt good, with no odd stretches needed to reach anything. I still haven't figured out all of the settings for the clocks, but with a GPS, I didn't need to really.

The footpegs were superb. Both comfortable to stand on for long periods and also in terms of weighting the bike to change direction when needed. 
On the whole, the bike felt as right as it looked whilst on the move.

Plastics, Frame etc
The quality of the plastics stands out from the get go with this bike. The decals are great quality and they showed no sign of marks or damage after the trip. The rear fender suffered a little from the weight of the drybag on the back for the first day. Every time I hit a rocky section at speed or bounced over a step, the weight of the bag would bend the rear fender until the rather large standard number plate finally broke off the bottom quarter when caught on the tyre. You can see a small crease where the plastic fuel tank ends and the tail piece continues. That said, it didn't break at all on the first day after 145 miles of bouncing. I swapped to an over the seat bag that night, which removed the issue. 
The paintwork on the frame just stands out as a great finish. You rarely see this level of paintwork on a dirt bike and the cherry red is a colour I really like. 


The bash plate is made from HDPE, so plastic. This is quieter than an alloy plate and the design protects the majority of the engine and frame, which is great. We had some shape changing at the bit that sits behind the exhaust header pipe. No doubt heat distortion. As a personal thing, I would like to explore longer protection piece for the rear linkage, but that is for the future.

Engine and Fuel Injection
The engine/fuel injection is lovely, it's perky, responsive and gives a good kick of power just when you want it. I found I could pootle in 1st up and over some rocky steps or through a ford, then kick it up to third for a boost of uphill before heading to 6th for some tarmac. The mapping on the Athena seemed to be about right for all things. None of this trip really pushed the bike hard, so it will be heading to a motocross track sometime soon for a blast and maybe to an enduro somewhere to. So time will provide more info on this setup. One thing for sure is, the package is versatile and agile. Weight distribution of the whole lump feels low down too, which is a good thing for trail riding as it helps with changing direction, jumping ruts etc plus riders often get caught out and drop the bike, meaning picking it up. If the weight is higher up, that becomes an issue. Especially if the bike is handlebars down off an embankment or something. At no point on the trip did I need any help to pick up the bike. To me that is a good thing!

Suspension
All round is the Sachs ZF suspension with 300mm of travel and good adjustability. With the bike loaded up, it actually felt pretty balanced with the stock suspension settings. on the first day, the suspension felt nice, but a little on the hard side. This softened up as the miles clocked up and I can safely say the suspension quality was one of my favourite things about this bike. It soaked up the rough ground, let you loft the front wheel as needed and saved my bacon a few times when I overcooked it a bit!
The rear shock is mounted to a rear linkage setup, this took a bit of a bashing as I hoiked the bike over some fallen logs and a horse gate en-route. Not sure if the bash plate could be extended to protect this a little. This is a feature on a lot of bikes available these days, so just something to be aware of I guess.


Wheels & Tyres
The stock bike comes with beautifully designed anodised hubs, black rims, stainless spokes and in this case, Michelin tyres. Over the mileage, the wheels took some punishment, yet remained looking good once washed. We installed mousses into the rear for the trip and had a UHD tube in the front. I managed to puncture the front, which required a change on a lane at 6pm at night, around 15 minutes from our accommodation & a beer!

Now using levers on any alloy rims always needs to be done carefully and this was so with these. The black finish can mark up right at the tyre edge, so as always, go gentle. We managed to demount the wheel, change the tyre and get going again pretty easily. That said one thing to note is that the rim lock are two different sizes, the front is a 12mm spanner and the rear is a 13mm spanner. That may be something to change over time, even is just for the ease of carrying tools/spares.

Brakes
Brembo brakes front and rear make up the kit. There is little to say here as they are such quality kit, they do their job superbly and are fitted to most bikes because of their superb well earned reputation. You get plenty of feedback from the front and it is progressive. the rotor is big enough to scrub the speed as you need. The rear can be a bit savage, ie the rear skids at a gentle dab, but I personally like that!


Range
The bike comes with a 9.5 litre rear mounted fuel tank, with a fuel pump inside pushing fuel into the injection system. The range on this amount of fuel was around 55 miles to the reserve light coming on and I never tested it to empty. Various discussion put the range at around 90 miles as there is a large reserve compared to other machines. My biggest fill was 7.2 litres. I make this to be roughly 10 miles to the litre. 
In terms of the other bikes I was with, an SWM RS300, a KTM 300 TPI and a KTM 450 EXCF, The SPR had the shortest range to the reserve light. It meant I spent time thinking about refuelling regularly. Carrying an extra bit of fuel would resolve this I guess. 


Summary

I guess, when it comes down to it all, the real question is would I buy this bike and ride it? For me the answer is simple, yes I would.

I recognise some of its flaws, ie range. But for the price, it is easily as capable as the KTM 250/350/400/450/500's that I've ridden. The quality of the bike is great and the suspension, footpegs and saddle just round the whole thing off. I think AJP have done a lovely job with this bike, I'm keen to see what these bikes can do in a competition setup now.


The 250 is really the bike for the green lane folk though I guess, it's smoother, quieter and less graunchy... but then, as always that depends upon the rider!

If you want to see a film of the bike in action, head across to MHB Motorcycles YouTube page: 
https://www.youtube.com/watch?v=gDwLdL41VzQ


For more details on these bikes, visit MHB Motorcycles at: 
https://mhbmotorcycles.co.uk/34-2/vehicles-new-used/ajp/


Saturday 21 August 2021

KTM 690 Enduro 2014: Adventure Tool??

I decided to try out the KTM 690 Enduro as the bike for my big trip plans and after owning one for just over two years, I've now got to the stage where I'm happy with it for the most part...

I already had the ideas in my head as to what I wanted my travel bike to become when I bought it, so the 690 has had a bit of a make over, something which constantly seems to happen to these bikes.


The finished bike needs to have a navigation tower and a taller screen for both practical reasons, and in my head, aesthetic reasons. I like the look of the rally bikes! It also needed a much bigger fuel range than stock.

I chose the 2014 model for two reasons,
1. This was the time KTM did a load of upgrades to the original bike which solved many of the issues of the earlier bikes and 2. Price, the 2016/17 versions were almost £1000 dearer in 2019.
My budget was a maximum of £5000, I found this one for £4200 with 19k miles on the clock. It rode well and the owner seemed to have looked after the bike, so I bought it.

I took it home and on the first ride out, managed to drop it and break a handguard. Once I picked it back up, I realised just how heavy it is and decided to look at how to save weight on it if I were to keep it and use it. 

After a lot of research into parts and various mods done by other folk, I settled on the following upgrades.

1. Rade Garage front fuel tank & air filter - Bought second hand for £150
2. Re upholster the saddle - added gel pad £160
3. Change the stock exhaust to a Wings one £400
4. Add a navigation tower and KTM rally screen £450
5. Add comfort things like heated grips, chargers, GPS etc. 
6. Changed headlights £400
7. Add a rear rack, rally footpegs and heel plates- £240
8. Improve fuel filtering

Wheels & Tyres
I want to change the stock wheels as they are the DID Dirt Stars that KTM fit to their six days EXC's  and the 690. They corrode heavily inside, which isn't that much of an issue if you use mousses and have access to the things we have in the UK, but where I was going, I didn't want the hassle of cracked rims and collapsed wheels in the middle of nowhere because of poorly made products.
The trouble is they start at £650 for replacement wheels and go upto £1500 + if you go for the likes of Haan hubs with Excel A60 rims. Not sure my funds can run to that at the moment, so I'll come back to that one. I've been in touch with Central Wheels in Coleshill, they have quoted £633 for SM Pro rims, stainless steel spokes and nickel steel nipples and the rebuild, so I'll probably go with that when the time is right.
My preference is to use the Motoz range of tyres on the rougher ground, I like the Rall z or Adventure on the rear and the Desert on the front. I'm currently trying the Michelin Karoo 3's for more road use, they ride well, so interested in their longevity. But in reality, I doubt I'll get much of a choice in some countries.

Gearing
This has been a big area for me to find the right kind of gearing for my bike and a big trip. In England, the trails can be tricky in some places. The stock gearing of 15/45 means the back wheel spins on muddy and steep terrain and I drop the bike, which is knackering after a couple of times. I've tried the 14/46, 14/48 & am currently on 14/50. My preference for tough terrain is the 14/50, but on the tarmac, this makes the bike run at 6000 RPM at 70 mph, which will wear the engine quicker and also make the bike vibrate more. So I'm going to try 16/50. The main reason for this is that a 14 front puts lots of stress on the drive internally, the 16 far less. The 50 allows for 70mph, but is great for the more technical terrain. I'll report back once I have tried it and see what happens.
Update: I've now done around 1600 miles on the 16/50 gearing. I like it. It works well in tough terrain and allows 70+ on tarmac. I think I'll stick with this for everything now.


Navigation Tower
In the meantime, I bought all the parts for the navigation tower and set about building it on plenty of wet rainy dark nights during the Covid lockdowns. I bought some 5mm aluminium sheet, some lexan sheet and lots of various sized stainless steel bolts. 


The design was made first using my version of 'CAD' design, (Cardboard Aided Design). Basically I cut up lots of cardboard until I got the idea right from my head to the bike, then once I had a template, I drew on the aluminium and cut it to shape. The final product was then filed, sanded and finished to get the shape just right. I used a jigsaw to cut the plate, but I also burnt out two of these, so if I do this again, I'll look at other methods. 

The tower was mounted to a bracket, which I bought from Perfect Fairings, (PF) in Greece. They are really good to deal with and their website is nice to use. I made the carrier plate from 6mm aluminium plate, then added the main 5mm plate and built off these three bits. PF do make a generic adventure tower, but I wanted to learn some new skills, so built my own from scratch.

I bought the screen from Motorcycle Spare Parts, (MSP), which now seem to be available direct in the UK. It is actually the 450 rally screen. There is a newer version now, but not when I bought this one. I made the dust cover bit for the headlights from the Lexan plastic sheet as well as some brackets that weren't load bearing.
UPDATE: On the whole this tower build has worked well enough. It sits a bit high with this screen, so wind deflection isn't great and on tough terrain, the screen can block your view a bit. I think the new lower KTM screen might be a good upgrade, but I'll not so it on this bike. So for now, more adventures!


Installed into the tower are all of the electronics and switches needed for the ancillary stuff like heated grips, 5v chargers, GPS, extra lights etc. The wiring fit was tight and all routed through an Rowe Electronics PDM 60 unit that acts as a switching box as well as providing relays.
These are used on lots of rally bikes as they are so reliable, but they aren't cheap at £170! One of the lads at MHB Motorbikes in Kirkby Stephen, Cumbria wired it all up for me as he loves his electronics, weirdo!! ;-)
Update: The PDM60 failed after a wet ride home one early evening. Lights flash upon switching on, but no power to the unit after that, so entire auxiliaries now dead. It's gone back to the supplier for testing. They've confirmed it's dead so we'll see where that goes. 


Saddle
I sent the saddle to a lady in Carlisle, who was recommended by some friends of mine, she added a gel pad and also reshaped the seat. Now it means I can sit for a couple of hours and not get numb legs, unlike the really poor stock KTM seat which after an hour was really painful. KTM really do need to steal the saddle designer from AJP and learn how to make comfy seats!
I've recently also cut a hole in the front of the seat pan to help with refuelling and added a cover to stop crap from collecting in the hole there. This now means I don't have to take all of the luggage off every time I need to fill the front tank. We'll see if this lasts though as the saddle pans are brittle apparently.
UPDATE: After 60k miles, the seat pan had cracked along it's length. The rubber bungs it sits on fell out and this allowed the seat to flex more, which caused the cracking. It's now really awful to sit on. So I've found a KTM comfy seat for £80 on the 690 FB group. Now it needs to be stripped down and rebuilt with the hole and so its comfortable. 


Fueling
One of the things that always concerns me with fuel injected bikes is how dependant they are upon having clean fuel. This isn't always an option when you're travelling, so I wanted to add extra filtration to the fuel system. I found the Guglatech fuel filter and sock combination, so stripped the fuel tank down and put in new KTM filters and added the fuel sock that sits around the fuel pump. I've not noticed any difference in the power delivery or found any issues with it so far.
I want to put a fuel sock at both of the fill up points, but I haven't found any nice ones as yet. The front Rade Garage tank sits nicely on the top of the engine and range on the bike has increased to 225 miles, with 18 litres of fuel. That is 12.5 miles to the litre.
Update: This bike has now done 60k miles. I've had no issues with fuelling at all, despite riding in a few countries with dodgy fuel. Time to replace the bag filter for the next trip though.


There are certain places that I'll need extra fuel, such as Mauritania, Mongolia etc, so for that I'm after the 20 litre fuel bladder from Fox, but they don't seem to be available in the UK.
UPDATE: Desert Fox 20 litre bladder is now available in the UK.

The one issue left is the air filter. The Rade Garage comes with a K&N 1760 angled filter. This is bulky and I can't find the corresponding sand filter for it, so that will be tricky when I get into the deserts. I still need to sort this out as it could wreck the engine. 
UPDATE: For the desert stuff I found a RamAir foam filter with a 62mm opening and I mounted the sensor on the top. I bought two and surrounded them with a secondary foam filter to reduce sand dust intake so I could swap them out. This seemed to work really well, but I felt like the fuel range was affected. That could have just been the sand dunes though as they impact the range immensly.


Lighting
The stock KTM headlight is on a par with the saddle, so bloody awful. After reading a recommendation from Walter Colebatch about a Russian company that was making some LED lights, I bought a set and mounted them alongside a cheap eBay LED spot light.
The MYK lights were great, until after about 3 months, one of the wires cracked and the lights stopped working. I reported it back to the Zavod, one of the guys who makes them, and he sent me a replacement. Great service. Unfortunately, this only lasted a month and started flickering. So I have removed it and both versions are now sat in the cupboard. I'll try to send them back to him before I go.

I bought some replacement lights from a French company called Motoboxer. The service was great too, the lights are not as good as the Russian ones in terms of beam range, but they do seem more durable. I'll keep using them and see how it goes. They are wired in to provide a back up light system. So for normal use, the bottom one is a standard two level beam, high/low, the upper is high only. The bottom one is my main headlight, but I now have a back up with the upper one as I can just swap the wiring. Dust and rain got into the tower past the headlight set up, so I used some Lexan plastic to cut and shape a protector. To bend it requires heat, this unfortunately distorts in the same place on each version, so I gave up and just mounted one, using KTM rally screen mounts from any KTM dealer. It's not as pretty as I'd like, but it does its job well. 


Suspension
The stock 690 suspension was a long time discussion for me, I prefer the EXC-f suspension, but once I had the stock suspension serviced and set up for me and the luggage, the bike was a different beast. It was a revelation to me how much nicer to ride the bike was to ride and so far I haven't found a reason to regret not replacing the stock. The service was £265. Worth every penny!!

Luggage
Luggage is another area I've played around with a lot over the last few years. The Giant Loop Coyote is good on enduro bikes, it's downside on the first generation was the zip and the lower straps which rub through eventually. I found I kept catching my feet on the bag bottom in ruts as well. Kit was well protected though and the inner liners were great.
I tried various friends luggage systems for general bikes and didn't like them for various reasons.  
Lately, the Kriega OS system is my current trial. I bought the carrier system first, a second hand version for £50 off eBay. To this I added the 20 litre Lomo drybags, these easily provide enough space for a long trip, two strapped to the Kriega OS and one as a top bag. I'm hearing really good things about the Kriega OS 18 bags, so will try to get hold of them before I actually go.
It was decided early on that I did not want the extra weight of a metal luggage rack or engine bars, the bike is already too heavy! So this places limitations of the types of luggage available.

Extras
A whole raft of extras have gone onto the bike, KTM rally footpegs, Side stand dongle, ABS dongle, rear rack, rear brake pedal, heel plates and rear tank filler cap. I've also added the Rally Raid rear tank mount bolts, upper and lower and changed the rear brake line so it is bolted to the swing arm, rather than clipped in. Heated grips, 12v & 5v chargers, case protectors, the AS Spec bash plate and the AMPlink PDM 60 switch box and a few more I've forgotten.


Parts Suppliers
Rade Garage - fuel tank - First generation, 6.0 litre tank + K&N air filter
Adventure Spec - AS make plenty of great kit for a range of bikes and general adventure riding. For the 690, I chose their sump guard, Symtec Heated Grips, Side casing protector, Pedal anchor kit, Ironman front and rear sprockets
3D Moto - Borys makes some really good kit for the 690, I bought the rear rack, the heel plates, the rear fuel tank filler cap and the big bertha rear brake pedal.
Perfect Fairings - Head stock mounting bracket, 
Motorcycle Spare Parts, (MST) - The KTM 450 rally screen, the pins for the top bracket, 
Guglatech - These supplied the in tank filter and a sock filter
KTM - I bought their rally footpegs, a new clutch and several spares for the trip direct from my local dealer.
Wings - exhaust end can
Adventure Warehouse - These supplied the AMPlink PDM 60 switch box
Rally Raid - Upper and lower tank bolts and an Oberon slave cylinder
MHB Motorcycles - The guys there helped me to shape the aluminium, wire up the electronics and just generally gave me someone to bounce ideas off.
Bridget O'Hara Upholstery - Bridget recovered the seat and added a gel pad, this increased my riding time from one to a numb bum to at least 3 hours! If this one dies, I'll look at the more expensive versions available.

The tower build cost just under £500. This included some 5mm aluminium plate, several sheets of black HDPE plastic for the side panels and some Lexan plastic for the headlight screen. All the bits were bought from suppliers on the internet. Lots of the bolts and paints etc came from local suppliers as I found I needed them. 

Summary
The main aim of removing and changing things on this bike was to lower the weight and give it a longer fuel range. I've done that now, even with the luggage. I'm trying to get it onto some good scales to find out exactly how much has been saved but calcs suggest around 20kg. 
 
On this bike, the stock headlight + screen weighs 6kg, the tower weights 1.5kg with the new lights and wiring, so total saving of 4.5kg. Taking out the airbox allowed me to improve fuel range and save weight, the stock airbox is 4kg, the fuel tank 1kg. Changing the wheels is a huge saving, roughly 12kg for the stock DID wheels and 8kg for SM Pro's plus they are stronger. The saddle increased in weight as I added a gel pad for comfort but I didn't weigh the seat before having it changed so can't tell you the difference. One of the biggest weight savings was the stock exhaust. If I remember right, this weighs 12kg with the catalytic inside and is so hot it melts everything. The Wings one is 2kg.

I removed/changed lots of little bits and all in all saved around 20kg off the standard bike weight.  

This translates to more miles per litre and when I drop it, less sweating to get it back on it's wheels. It's still heavy, there is no two ways about that, but slightly less so!

With all the changes made, I have spent £1900 on extra's. So total cost of the build, including buying the bike, is now £6100.00.

Since buying the bike, the mileage has increased to 34,200, so it's done 15,000 miles during its changes over the last 2 years. This has included several multi day trips on both road and trails and also in some pay & play places to find out what it's limits are. I'd like to see it at 100,000 miles as then it'll be my highest mileage bike so far. This bike has been very reliable and proved itself to be more capable than I am as a rider. 

Bottom line I guess, I like this bike and can happily see me riding around the world on it, even though I know I will have to avoid some of the more highly technical areas as it does have its limitations and I am just not strong enough to keep picking it up all day long.

I'm always keeping my eye on bikes in the market, the ideal for me would be a KTM 350 EXC-f rolling chassis, with the KTM Duke 390 engine in it and a big front tank. I like the AJP PR7, but can't afford one and I'm waiting to see what KTM brings out with their project 500 that they are currently working on. 
UPDATE: The latest Kove 450 Rally has caught my eye, it just needs some proven reliability and easy access to parts. It ticks all the other boxes for a rider with my goals. 

Time will tell, but with current homologation regulations, it may well be strangled on emissions or have to be bigger to get the performance. Also, as of this week, Triumph have announced they are looking to build capable, small engine, off road bikes, so maybe they will be the ones to finally answer the call of the overland adventure market.

The time of the huge and heavy adventure bikes is right now, bought by folk who rarely let them see the dry dirt, let alone technical and tough terrain, but they buy into the concept and illusion, whilst not wanting to devalue their machines. Will the small capacity, long range tough as old boots adventure bike come next? Time will tell I guess...


Monday 9 August 2021

Trans America Trail 2014 Film

 I've just finally spent some time learning how to make film from all of the GoPro footage we took in 2014 when two of us rode the Trans America Trail.


I have no idea why it's taken me so long to do this, but for a first attempt, it's OK, see what you think!!

The file is too big for Blogger to handle, so you'll have to copy the YouTube link into your browser: https://youtu.be/bXSo_h_0Mrs


Monday 14 June 2021

Coast to Coast: Cumbria to North Yorkshire

Another planned route for this summer was to complete a Coast to Coast from Cumbria across to Scarborough in North Yorkshire. Enlisted into this little escapade was a mate Nigel, who wanted to try out his KTM 790 Adventure on a longer camping trip. The route turned out to be 750 miles of all types of green lane, B & C road and a tiny amount of faster A road.

Day 1:

We met up on a damp Friday morning. Grey skies and a little bit of drizzle hung heavy in the air. Our route took us down the west coast of Cumbria to Stubb Place on the west coast, just south of Ravenglass. Here, there is a railway bridge that goes over a tidal section of road, so make sure you get the tides right to start there!

As we both know the Cumbrian lanes pretty well, we knew the day should flow nicely, so were both quite relaxed. A rhythm soon developed of gate opening, picture stops, gossip stops and a bit of banter with the regular supply of walkers on the lanes these days. The ferry over Windermere wasn't as busy as expected and the stop at the cafe was a bit of a giggle with the two folk working there. This one is a bit of a regular stop for the Cumbria TRF folk.


The afternoon turned warm and sunny and we finished the day with a wild camp on our highest point of the day. A bit of breeze saw off the midges and we sat and talked the day through over a bottle of wine and a variety of camp food.


Day 2:

We were traversing across the southern end of Cumbria, crossing into the newly appointed Westmorland Dales area. A stop for fuel at the busy little farm garage at Nateby, saw us fueled up for the roads to come. This particular route was a good mix of beautiful and winding fell road mixed with the odd unsealed road on our way towards Barnard Castle. (We tried to book an opticians appointment, but they all seemed to be booked with politicians from London for some reason). I especially took a shine to the road that wound up through West Stone Dale to the Tan Inn. Great views and a stunning road on these types of bikes!


From Barnard Castle, we headed south and into the Dales, stopping for cream tea at Helwith cafe. The couple there are lovely and everything is homemade, another hidden gem which the TRF lads locally support with their passing trade each week.


Nigel had a moment of sheer terror as he made a descent into one of the fords around this area, but the bike and he handled it fine. This boosted his confidence loads and he seemed to settle a little more.

At Scar House reservoir, we met a lovely young couple out for the day in their little Jimny and watched the Curlews flying over the moorland for a bit. We also found a field lane blocked by big straw bales. I managed to sneak past with a bit of swearing and effort but the 790 had no chance, so had to re-route.

Once through Ripon, we crossed the A1m and entered into the rolling hillsides to the south of the main North Yorkshire moors. We'd set off at 6am, by 5pm, we were flagging a little and starting to look for camping spots. The area was a lot of farmland and quite populated so at 6.30pm, we decided to head for Helmsley and get some food, then sort out a camp place. We ended up in a beautiful place with a great view over the moors. A farmers wife walking her dogs came to check what we were upto, but with some good gossip and exchanges, she was convinced we weren't upto anything nefarious and wished us a good nights sleep. We sat and drank more wine,whilst reliving the day and the lanes and enjoying the view before turning in for the night.


Day 3:

The day started early again at 5am and with getting eaten alive by midges, no wind, a warm sun. Usually a blessing on this little island. But for midges, it's heaven sent and out they came in their thousands to feast upon the two of us for the time it took us to rapidly pack up!


Once back on our route, we wound along the southern edge of the moors, dipping into the forest north of us on regular intervals. I nearly got took out by a deer at one point, as it leapt out of a bit of woodland. Nigel had to deal with his fears of fords again and we ended up in Scarborough at 10am. 


After eating crab sandwiches on a very busy beach, we headed out again on our return northern loop. The lanes were all pretty good until we came to a steep lane that was heavily rutted. After the initial start up the hillside, Nigel was having a mare. I rode about 2/3 rds of the way up, then stopped to go back to help Nigel. After seeing the next sections, I knew he wouldn't get up the lane on both that bike and with the tyres he had on. So some nifty reversing on slippy steep ground got him back to the flat and he left to find a way around, with the plan to meet up at the top.


1.5 hours later, he found his way back down to me where I'd gotten stuck in a deep wet clay and tree root lined rut. I'd managed to get from my stopping point to about 30 feet past there in that time. I was on the edge of getting out of the thing, but had the back wheel spinning on a tree route and the bike was just to heavy for me alone to pull it up onto the harder centre line. Once Nigel turned up. Three little shoves and I was free again, then it was upto the last bit before a romp to the top. The car park, ice cream van and good banter at the state of me with several folk in the car park lifted my flagging spirits immensely.


Once we had both recovered and I'd got rid of some of the clay that was stuck to the bike, we set off again. Plenty of nice lanes followed, several fords and some great views. My bike however, wasn't happy. The temperature light had come on and the thermometer gauge was flashing. We stopped and I topped up the fluids, thinking it had over heated whilst trying to extract it from the mud. It was OK for a little bit then the lights all came on again, but this time the fault code light as well. 


We ended up bailing on the rest of the route, I crept home, regularly topping up the radiator and riding at 30 mph all the way. Once home at 9.30pm, I unloaded kit and put the bike away to give it a good wash tomorrow and find out what the problem was. Turned out the radiator had split at the top. A mere £411 from KTM!!

Still, another trip of memories and lads of new areas and lanes explored. Green lanes do take you to some great places!


Sunday 6 June 2021

Scotland: Southern Islands Tour

 An impromptu couple of work cancellations left me with some free time and as my 690 has almost completed it transformation into an adventure bike for travelling the world upon, I decided to pack some kit and head up north. I vaguely mentioned this to a mate, Nigel, who jumped at the chance and so off we set on a damp Monday morning last week.

Weaving through the growing traffic levels near Carlisle these days, we headed onto the back roads, crossing River Esk estuary into Scotland via Gretna Green. Some meandering around got us to Dumfries for a fuel stop before heading north via AE forest and over towards Sanquhar. 


We avoided all the main roads where possible, sticking to the smaller B roads and adding in a couple of the forest dirt roads. Nigel was on his BMW GS1200, so not keen to get onto anything too serious, we stuck mainly to tarmac for the trip. 

We arrived at Wemyss Bay around early evening and caught the last ferry across to Bute. Once across a very calm sea, we headed south to find a camping spot for the night. After a lovely visit to St Blanes, a ruin of a chapel, (originally built in the 6th century), we started looking for a camp spot.


Unfortunately, the island is basically a series of farms, interspersed by small villages, so wild camping spots proved difficult to find. The one we did find looked great until we noticed the tide debris, which came up higher than the only good camp spot. It had also started to rain now, so we headed back to Rothesay and ended up in the Bute Backpackers Hotel, which happened to be run by a fella who was mad about old British bikes. Needless to say, after some fish and chips from the local chippy, we passed the night talking about bikes!

Day 2 dawned warm and sunny. Once we had loaded up the bikes, we headed back south to explore. We found the ideal, but illusive wild camp spot, a beach with great views, where we lingered for awhile as it was such a lovely spot.


The island isn't very big and the roads limited, so after Nigel had gotten shouted at by a grumpy farmer as we passed on a dirt road through his farm yard, we found ourselves on the road heading for the northern ferry.

Its a very short hop across back to the mainland at Colintraive, which then opens up onto the really fast, sweeping A886. This joined onto the A8003, which wound its way down to Portavadie / Tarbert, where we could get the ferry across from one peninsula to another. The roads here are beautiful and Scotland in this warm sunny weather is truly magical!.


Our third ferry saw us in Tarbert. We headed south and onto the B8001/B842 which took us down the east side of the peninsula and Cambeltown, which is the main town on the Mull of Kintyre. Lots of sweeping roads took us back north, until Nigel had to pull up as he had a puncture. We found a garage near Oban, filled it full of green goo and that seemed to do the trick as we carried for the rest of the trip with it.


Camp that night was at the back of some ruined Black Cottages. These were houses given to locals by a Laird in older times. However, during the clearances of the 1700's, where the population of Scotland and Ireland was effectively thrown out and moved to Canada, America and Australia, these building had their timber roofs taken off and burnt so they were inhabitable. Apparently sheep were more profitable than people after the clan wars and the uprising was quelled by the English. 


Day 3: After some midges came to say hello, both the previous evening and in the morning, causing me to grumble a bit as I got bitten all over, we packed and headed up the B845, heading towards Corran and our next ferry crossing. 

The Corran ferry is another small one, friendly and we were very lucky to arrive as they were finishing loading and had space at the back for a couple of bikes. Once across Loch Linnhe, we followed the A861 until a turn off for the B8043. This turned out to be a narrow, single lane road that wound through some great scenery and it is also on the Scottish Six Days International Trial route. If you're not familiar with that, look it up, it's a gem of a competition!


Arriving at Lochaline, we found a small cafe, so bacon butties and coffee all round. Then another short hop on the ferry. Whilst waiting in the queue, I got a shove in my back and a 'eh up, I thought it was you!' This turned out to be a mate from Cumbria, out on a jolly with his wife and another couple. Going for a tour around Mull before heading back south later in the day. Some good craic was soon to be had and the ferry journey over way to soon!


Mull is a beautiful island. Well worth a visit on any tour. After the brief one day trip onto here, I want to go back and have a good mooch around. The history and the scenery is stunning. There are two of the Munro's on the island and also the beautiful Calgary Bay. The story of that area is heart breaking. During the clearances, the Laird threw out thousands of the areas inhabitants. They were left at Calgary Bay to await ships to take them to Canada & North America. During the three week wait, they suffered deaths in the thousands from disease and raids. The bodies were left there to rot and a memorial stone sits near the quay where they were finally loaded onto the ships. This is just one story of this appalling crime against humanity during these times. 


As a stark contrast to this, as we rode down the approach road, we saw White Tailed Eagles and a Golden Eagle. There were loads of other birds but these majestic beauties held our attention until they disappeared into the distance.


We left the island via another ferry at Tobermory, heading to Kilchoan on the Ardnamurchan Peninsula after some great fish and chips in Tobermory.
All the roads here are single lane with passing places and the area is how Scotland was 30 years ago before road builders made all the roads wider.

We had a look at Sanna Bay, another white sandy bay, spoilt by the unwelcoming signage there from the land owners who I guess are trying to preserve the place from the hordes who show no respect for their surroundings. 


As it was pretty late,we found a wild camp next to the road side, hardly any midges and quiet made it an excellent spot for a few hours. 

Day 4 started with a visit to the lighthouse at Ardnamuchan, which turned out to be closed for repairs, so we headed along the B8007, stopping often to enjoy the views of Skye, Rhum, Eigg and the rest. Breakfast at Ardshealach saw us filling ourselves up with a traditional Scottish breakfast, haggis and all! Once replete, a visit to Castle Tioram where Nigel recounted the story of the Laird who had buit it for his wife as a token of his love and then burnt it to the ground when the English tried to use its position and fortifications as a war tool. 

After this, it was some great riding to get to Arisaig and visit the surrounding areas, before a trip to Mallaig for fuel and a camp on a friend of Nigel's campsite. 


Day 5: We set off with a slightly dry mouth after finishing off a bottle of malt whiskey the night before watching seals play in the bay. Still lots of coffee, tea and some breakfast sorted us out and after saying our goodbyes, we headed over to Creag Meagaidh National Park. the A86 is a joy on a bike and more than pays for the horrible A82 that goes north of Fort William. 


As we were heading home now, we had all day, so our route took us past Struan and down to Loch Tummel, then onto the Tay Forest and underneath Schiehallion. At Aberfeldy, we headed south to Crieff and bypassed Stirling on the back roads. The M74 took us down towards Larkhall where we jumped onto the B7078,(the old A74). this took us back to Carlisle via some excellent sections of sweeping bends. this finished the trip off and we were back in houses in time for tea.

Another excellent trip. My 690 performed really well, it coped with all the 1100 + road miles easily, so next up is a rougher surface type of trip to make sure everything stands up to the test!